To install a septic tank riser, you must excavate the soil above your tank lid, clean the mounting surface, secure a watertight riser adapter to the tank with high-grade sealant, and stack the riser segments to reach ground level. This simple upgrade eliminates the need for professional tank locating or heavy digging every time your system requires service.
For many homeowners in the Sacramento area, the "out of sight, out of mind" nature of a buried septic tank leads to avoided maintenance and expensive surprises. When your tank is buried several feet underground, routine pumping often involves backbreaking labor or extra fees just to access the lid. Beyond the physical work, an inaccessible tank makes it nearly impossible to spot early warning signs of system failure or baffle damage before they turn into a backyard disaster.
In this guide, you will learn the exact process for a professional-grade septic tank riser installation, the tools you’ll need to get it done right, and how this investment protects your property’s value. Let’s walk through the steps to make your septic system more manageable.
Why Septic Tank Risers Are Essential for Sacramento Homeowners
A septic tank riser is a durable, watertight plastic or fiberglass pipe that extends from the top of your buried tank to the surface of your yard. By installing a septic riser, you create a permanent access portal that sits flush with the ground, capped by a secure lid. This replaces the traditional method of burying the tank lid under layers of dirt, grass, or gravel, which requires heavy digging every time the system needs attention.
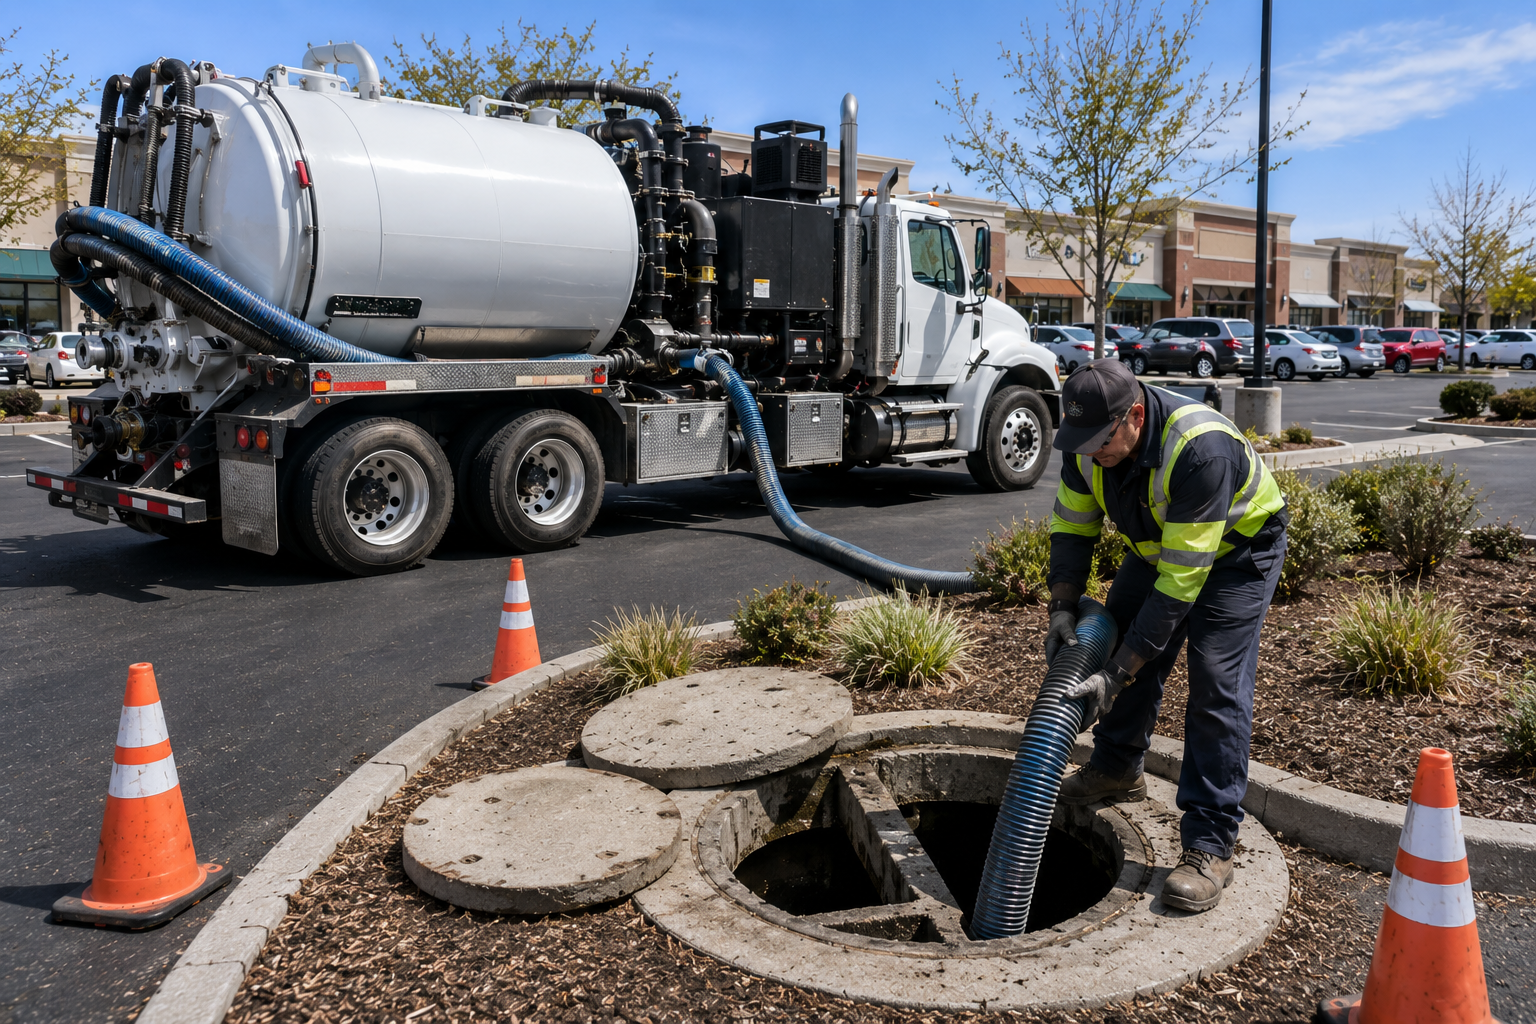
In the Sacramento Valley, where soil conditions can shift or become compacted, having easy access is about more than just convenience—it is about system longevity. When a lid is buried, homeowners often delay critical maintenance because they don't want to dig up their landscaping. This delay is a leading cause of system failure. Septic tank risers ensure that technicians can perform septic tank cleaning and pumping quickly and without leaving a massive hole in your lawn.
Key Benefits of a Professional Riser Install
- Cost Savings: You eliminate "dig fees" charged by service companies to locate and uncover buried lids.
- Safety and Visibility: A properly sealed septic riser and lid installation prevents accidental cave-ins and ensures the tank is easily identifiable during inspections.
- Emergency Readiness: If your drains back up, every minute counts. A riser allows for immediate troubleshooting without the need for a shovel.
A common misconception is that any heavy-duty pipe will work as a riser. However, using improper materials can lead to groundwater leaks, which saturate your leach field and cause premature system collapse. Understanding the right way to install riser on septic tank components is the first step toward a maintenance-free yard.
How to Install a Septic Tank Riser: A Professional Step-by-Step Guide
Properly installing septic tank risers is one of the best proactive steps you can take to simplify your home maintenance. While the concept is straightforward, the execution must be precise to ensure a watertight seal that prevents dirt and groundwater from entering your tank. If you are preparing for a real estate septic system inspection, having risers already in place can significantly speed up the process and demonstrate that the system has been well-maintained.
Follow these steps to complete a professional-grade septic tank riser install.
1. Locate and Uncover the Tank Lid
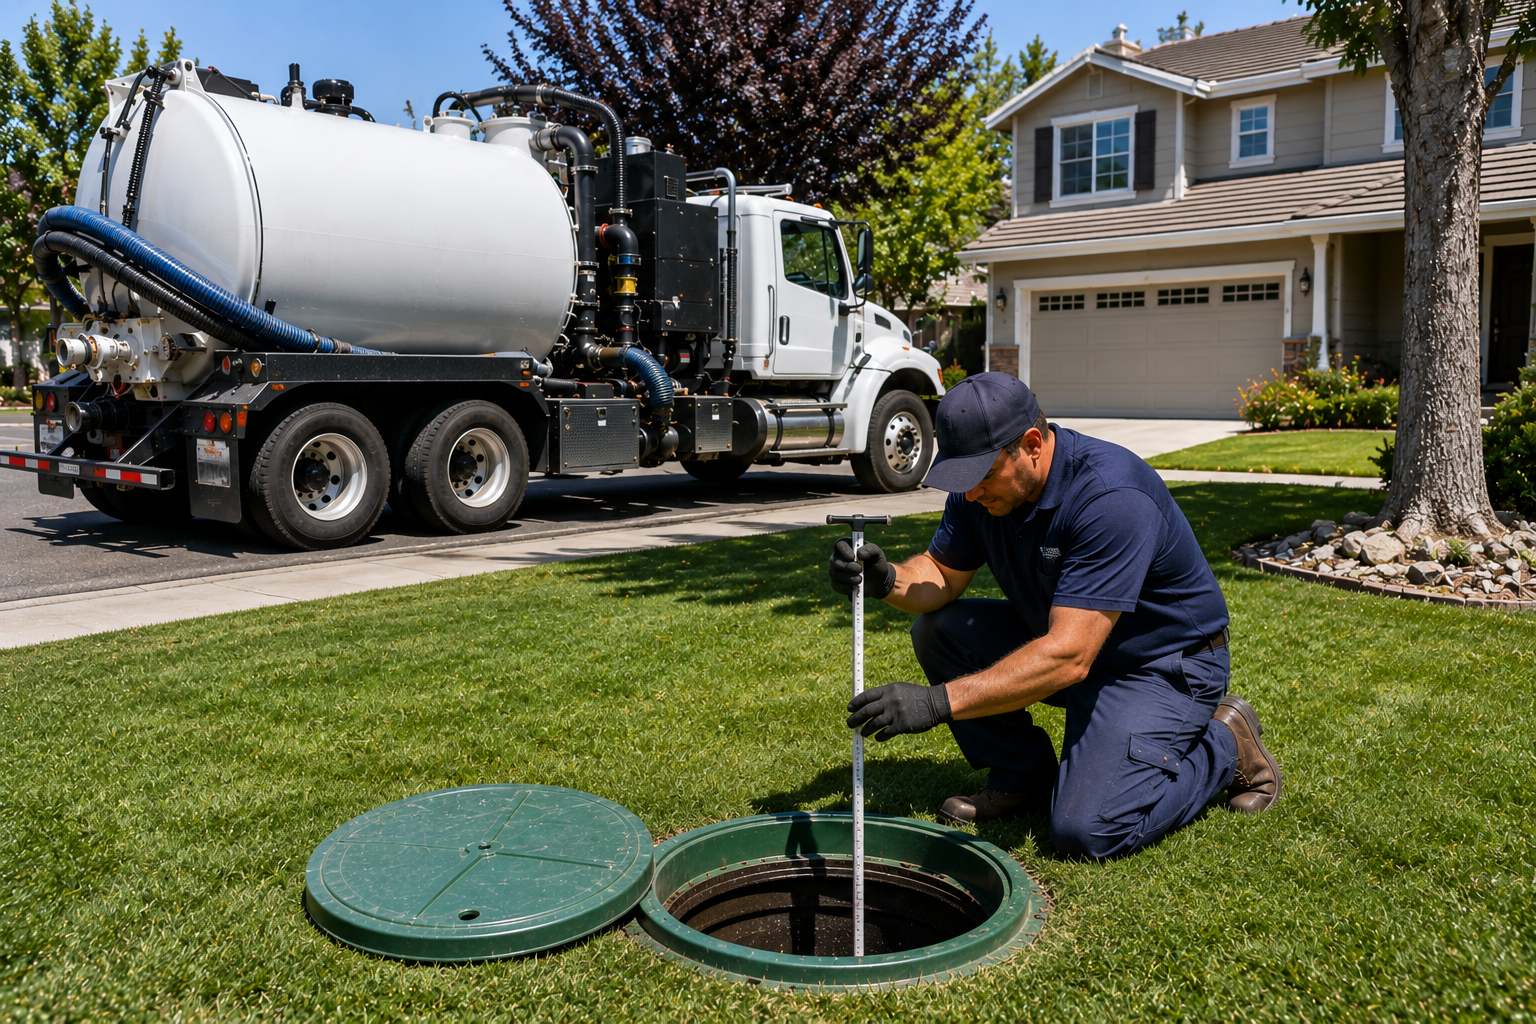
The first step is identifying exactly where your tank is buried. If you don't have a map of your system, look for areas where the grass grows differently or use a soil probe. You will need to excavate the dirt until the entire concrete or plastic lid is exposed. Dig about 6 inches wider than the lid itself to give yourself enough room to work comfortably on the septic tank riser installation.
2. Clean the Mounting Surface
Once the tank top is exposed, remove the old lid. Use a wire brush and a damp rag to scrub the concrete surface around the access hole. This is the most critical part of the process—if there is lingering dirt, moisture, or debris, the sealant will not bond, and your riser will leak. A leaking riser allows surface water to flood your tank, which can lead to a hydraulic overload of your leach field.
3. Install the Riser Adapter Ring
Most modern riser kits use an adapter ring that creates a flat, secure base for the riser pipe. Apply a heavy bead of high-grade butyl rubber sealant or specialized septic silicone to the bottom of the adapter ring. Press it firmly onto the cleaned concrete surface. For added security, many professionals use concrete anchors to bolt the ring into the tank. This ensures that the install riser on septic tank assembly remains stable even as the ground shifts over time.
4. Stack the Riser Sections to Grade
Measure the distance from the adapter ring to the surface of your lawn. Septic risers come in various heights (usually 6, 12, or 18 inches) and can be stacked to reach the desired level.
- Pro Tip: Aim for the top of the riser to sit about 1 to 2 inches above the ground level. This prevents lawnmowers from hitting the lid while ensuring that rainwater flows away from the opening rather than pooling on top of it.
- Apply sealant between each stacked section to maintain a watertight column.
5. Secure the Safety Lid
Place the heavy-duty, reinforced lid on top of the final riser section. Use the provided stainless steel screws to lock the lid in place. These lids are designed to be "child-safe," meaning they cannot be removed without tools. This is a vital safety feature for any Sacramento backyard. Once the lid is secure, you can backfill the dirt around the riser, tamping it down firmly to prevent settling.
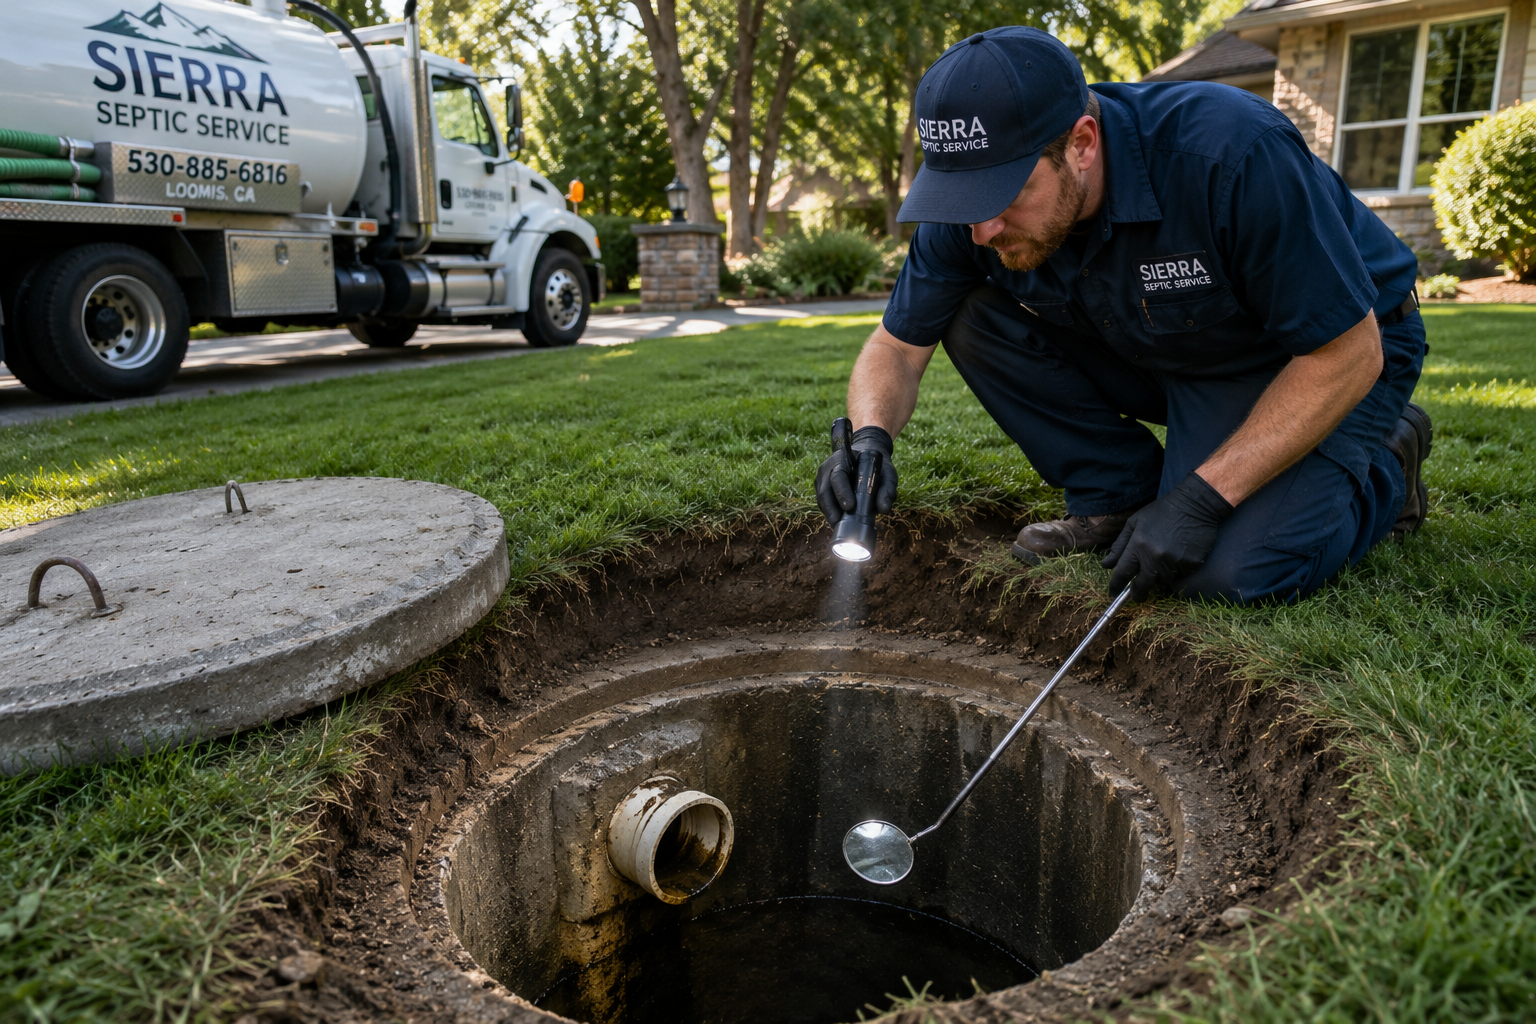
6. Verify the Seal
Before completely finishing the landscaping, check your work. If you notice any gaps in the sealant, fill them immediately. A successful septic riser project should look clean and sit level with your yard. With the installation complete, your system is now ready for future lift station pumping or routine inspections without ever needing a shovel again.
By following these steps, you’ve effectively transitioned your septic system from a buried mystery to a manageable utility. You have saved yourself hundreds of dollars in future labor costs and provided an easy way to monitor your tank's health year-round.
Real-World Benefits of Installing a Septic Tank Riser
Seeing how this upgrade functions in everyday scenarios helps illustrate why so many Sacramento property owners prioritize it. Installing septic tank risers isn't just about following code; it’s about making life as a homeowner significantly easier.
Case 1: The Proactive Homeowner
A family in Roseville noticed their lawn was being torn up every two years for routine maintenance. By choosing to install septic riser equipment, they moved the access point to the surface. The next time they scheduled septic tank pumping, the technician finished the job in half the time, and the yard remained completely intact, saving the family both money and landscaping stress.
Case 2: The Real Estate Transaction
During a home sale in Elk Grove, a buyer requested a full system evaluation. Because the seller had already completed a septic tank riser install, the inspector was able to open the tank immediately to check the baffles and liquid levels. This transparency provided instant peace of mind to the buyer and prevented any delays in the closing process that typically occur when a tank must be located and excavated.
Case 3: The Emergency Response
A property owner in Citrus Heights faced a sudden backup during a heavy rainstorm. With a septic riser in place, a technician was able to diagnose a clogged outlet filter within minutes of arriving, preventing a messy interior backup.
These examples prove that a riser is one of the most practical investments you can make. It turns a hidden liability into an accessible, well-managed part of your home’s infrastructure.
Professional Tips for a Successful Septic Tank Riser Install
Moving from a basic understanding to a successful septic tank riser installation requires attention to detail. These expert insights ensure your upgrade remains durable, watertight, and safe for decades to come.
- Prioritize a Watertight Seal The most common failure in DIY installs is groundwater leaking into the tank. Always use high-quality butyl rope or specialized septic sealants rather than standard hardware store caulk. If you aren't confident in the seal, it is worth having a professional handle the septic risers and lid installation to prevent hydraulic overloading of your system during Sacramento’s rainy season.
- Insulate in Colder Pockets If your property is in higher elevation areas like Auburn or Colfax, consider adding a layer of foam insulation inside the riser. This prevents frost from traveling down the riser and potentially freezing the liquid surface in the tank during extreme cold snaps, ensuring your system flows year-round.
- Use Safety Screens Beyond the heavy-duty lid, install a secondary safety screen (often called a "safety pan") inside the riser. This acts as a fallback protection measure. In the rare event a lid is left loose or damaged, the screen prevents children or pets from falling into the tank, providing an essential layer of backyard security.
- Map the Final Location Even though the septic risers will be visible, take a quick photo of the finished project relative to your home’s foundation. This documentation is incredibly helpful for future owners or technicians who may need to verify the exact layout of the tank and its compartments during a deep system cleaning.
Applying these best practices ensures your riser isn't just a convenience, but a long-term improvement to your property's safety and functionality.
Get Expert Help with Your Septic Tank Riser Installation
Installing a septic tank riser is one of the most effective ways to simplify your home maintenance and protect your property’s value. You now understand how to choose the right materials, create a watertight seal, and position the riser for easy, long-term access. By moving your tank’s entry point to the surface, you eliminate the need for future digging and ensure that your system can be serviced quickly and safely.
Taking this proactive step today prevents the stress of emergency excavations and helps you stay ahead of routine maintenance. Whether you are looking to improve your backyard safety or prepare for a smooth property sale, a professional riser install provides lasting peace of mind. If you’re ready to upgrade your system with durable, code-compliant components, contact the experts at Blue Ribbon Septic for professional septic riser and lid installation today.
Frequently Asked Questions About Septic Risers
How much does it cost to install a septic tank riser?
The cost for a professional septic tank riser install typically ranges from $300 to $600 per riser, depending on the depth of your tank and the materials used. While DIY kits are available for less, professional installation ensures a watertight seal and proper anchoring. This upfront investment quickly pays for itself by eliminating the "dig fees" service companies charge every time they perform septic tank pumping.
Can I install a riser on an older concrete septic tank?
Yes, you can install riser on septic tank units made of concrete, even if they are decades old. The key is ensuring the concrete surface is structurally sound and thoroughly cleaned before applying the adapter ring. Professionals use specialized masonry anchors and heavy-duty butyl sealant to create a permanent, leak-proof bond between the old concrete and the new plastic riser components.
Are septic tank risers safe for children and pets?
Modern septic tank risers are designed with safety as a top priority. They feature heavy-duty, reinforced lids that are secured with stainless steel screws, making them "child-safe" as they cannot be opened without tools. For added security, many homeowners opt for a secondary safety screen installed inside the pipe, which provides a fallback barrier in the unlikely event that the primary lid is damaged or left unsecured.
Do septic tank risers smell or look bad in the yard?
When a septic tank riser installation is performed correctly, there should be no odor. The airtight seals and gaskets in the lid keep gases trapped inside the system where they belong. Aesthetically, most risers are green or black and designed to sit flush with or just slightly above the turf. This allows them to blend in with your landscaping or be easily hidden by a decorative "fake rock" cover.