A septic tank riser is a durable, vertical pipe that extends from your underground tank to ground level, allowing for instant access without the need for backbreaking digging. For many homeowners, the struggle of locating and unearthing a buried lid every few years is not just a chore—it is a significant barrier to the routine maintenance your system requires. When your tank is buried deep beneath the soil, it is easy to adopt an "out of sight, out of mind" mentality, which often leads to neglected pumping and eventually, costly system failures.
By installing a septic tank riser kit, you eliminate the labor-intensive process of excavating your yard every time a technician visits. This upgrade ensures that inspections and emergency services are fast and efficient, protecting both your landscaping and your wallet. In this guide, you’ll learn how septic risers improve system safety, simplify maintenance, and why they are the most practical investment you can make for your property.
Here is everything you need to know about making your septic system more accessible.
What is a Septic Tank Riser and Why Does Your System Need One?
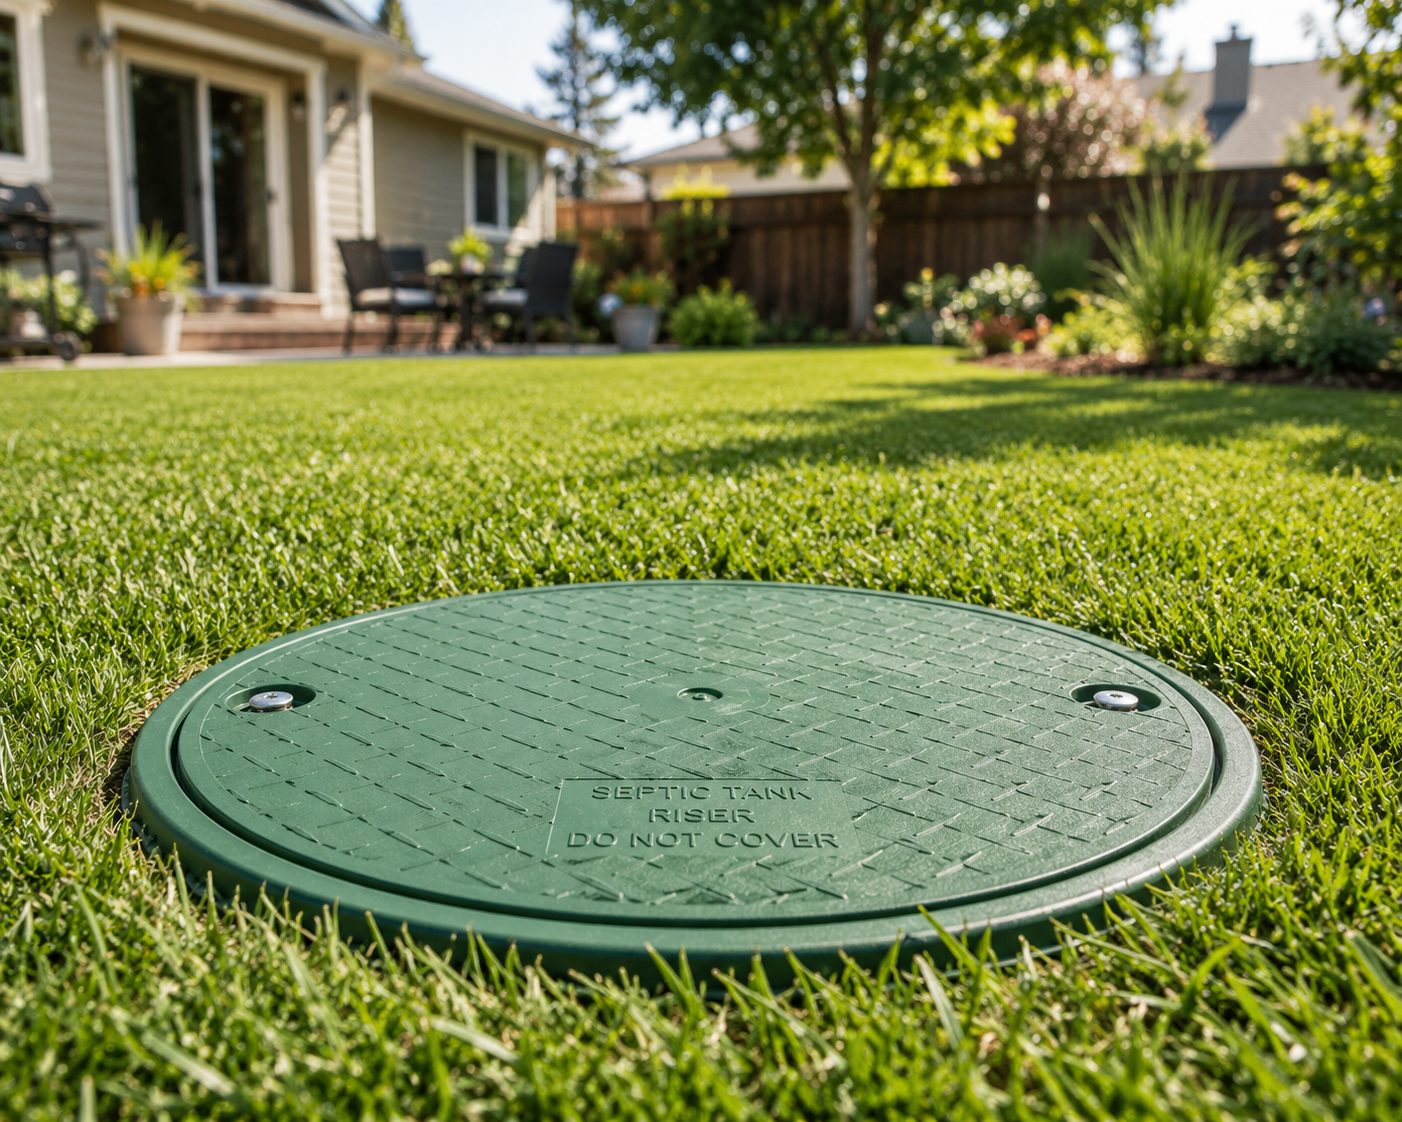
A septic tank riser is a specialized, airtight extension pipe—usually made of heavy-duty plastic or concrete—that bridges the gap between your septic tank’s access port and the surface of your yard. Essentially, it acts as a permanent portal. Instead of having a lid buried several feet underground, the riser brings the access point up to ground level, capped with a secure septic tank riser cover that sits flush with or slightly above the grass.
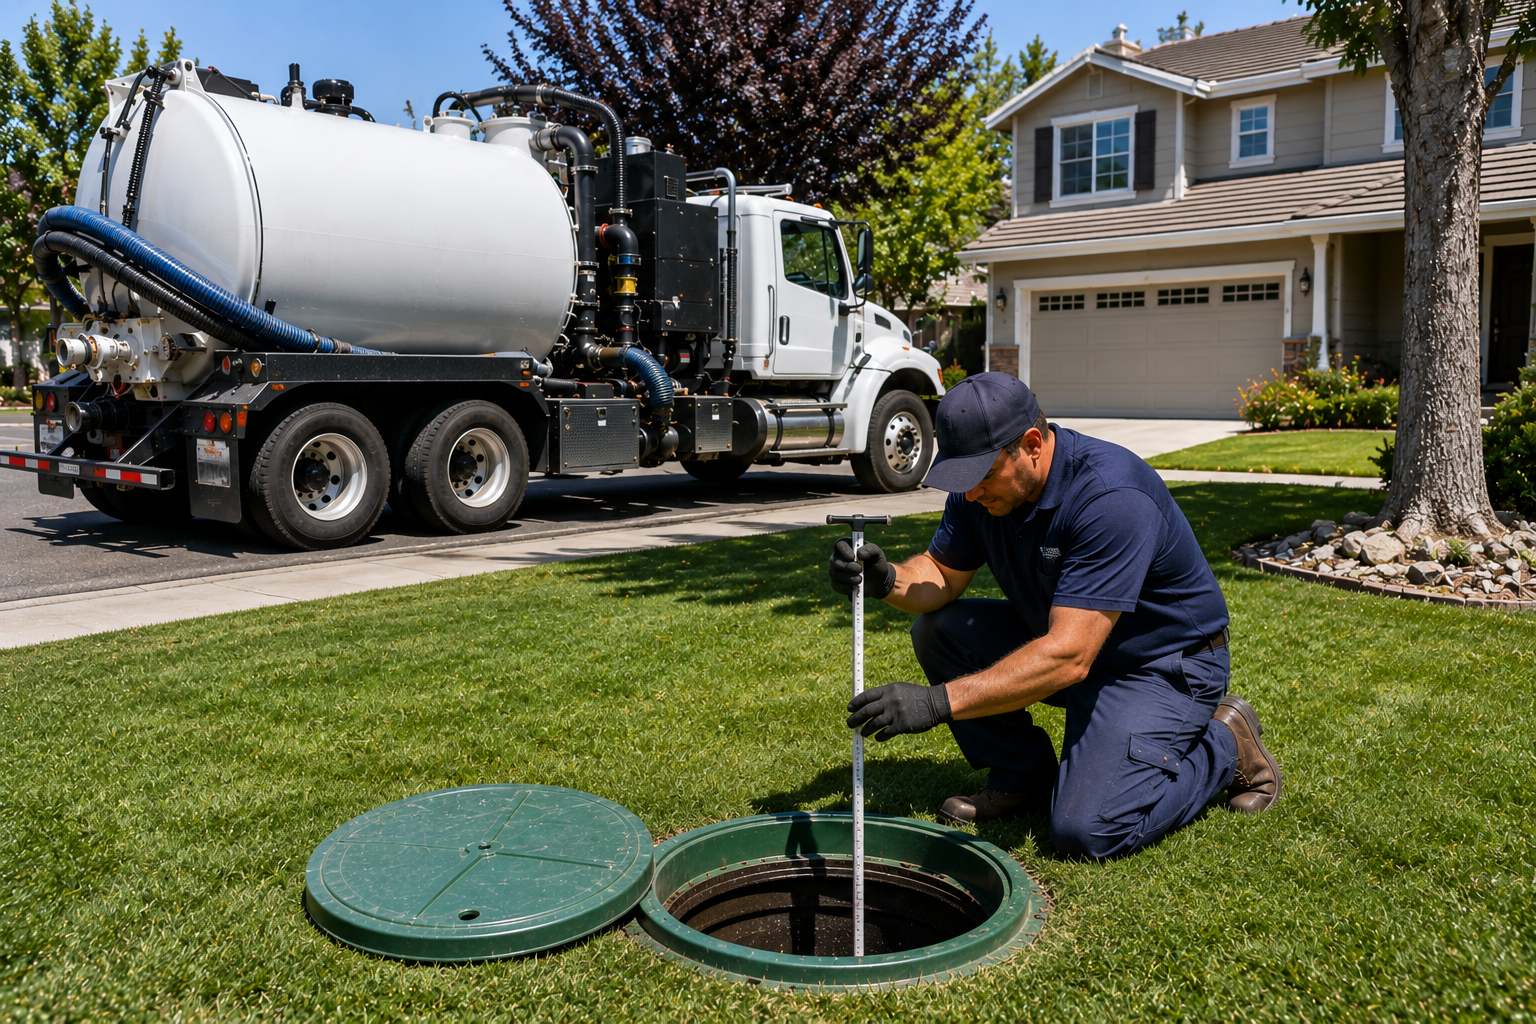
For homeowners in the Sacramento region, this upgrade is about moving from guesswork to certainty. Without a septic tank riser, every routine service starts with tank locating, which often involves probing the lawn and digging deep holes. This process is not only time-consuming but can be expensive if you have to pay a technician to excavate every time. More importantly, in an emergency backup situation, every minute counts; waiting for a technician to find and dig out a buried lid can be the difference between a quick fix and a localized disaster.
Installing septic system risers provides several immediate practical advantages:
- Instant Visibility: You’ll never lose track of where your tank is located, which is vital for preventing vehicles or heavy equipment from driving over sensitive areas.
- Cost Savings: You eliminate the "dig fee" associated with every pumping or inspection visit.
- Improved Safety: A high-quality septic riser kit includes a reinforced, secondary safety barrier or a heavy-duty locking lid to prevent accidental entry.
Many people assume their system is "fine" as long as there are no puddles in the yard, but a buried system is a hidden system. Bringing your access point to the surface makes it easy to stick to a preventative maintenance schedule, ensuring your home’s waste management remains reliable for decades.
Why Installing a Septic Tank Riser is the Ultimate System Upgrade
Installing a septic tank riser is more than just a convenience; it is a fundamental shift in how you manage your property’s infrastructure. By bringing the access point of your system to the surface, you transition from reactive repairs to proactive care. At Blue Ribbon Septic, we have seen firsthand how a simple septic riser kit can save homeowners thousands of dollars in labor and landscaping costs over the life of their system.
1. Eliminating the "Dig Fee" and Landscaping Damage
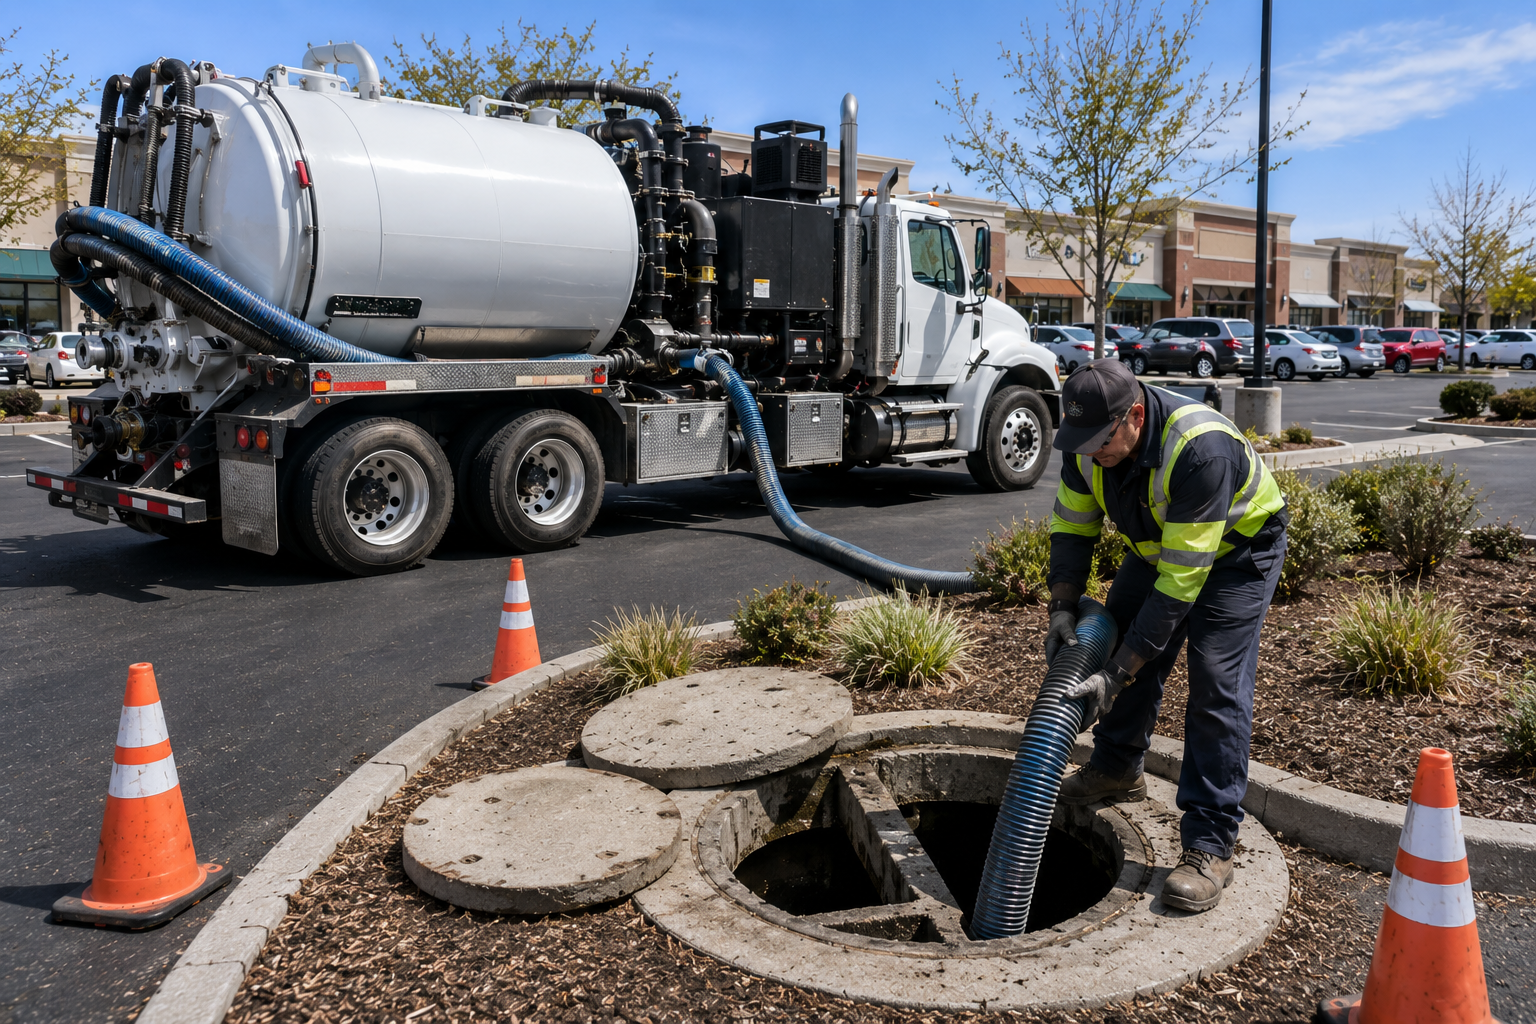
Every time your tank needs a septic tank cleaning or pumping, a technician has to reach the main access port. If your lid is buried 12 to 24 inches underground, that involves significant manual labor. Not only do most companies charge an excavation fee for this service, but it also leaves a literal hole in your lawn or garden beds.
With a septic tank riser, the technician simply unscrews a few bolts on the septic riser cover, completes the service, and moves on. Your grass stays intact, and your service bill remains focused on the maintenance itself rather than the labor of moving dirt.
2. Ensuring Fast Response During Emergencies
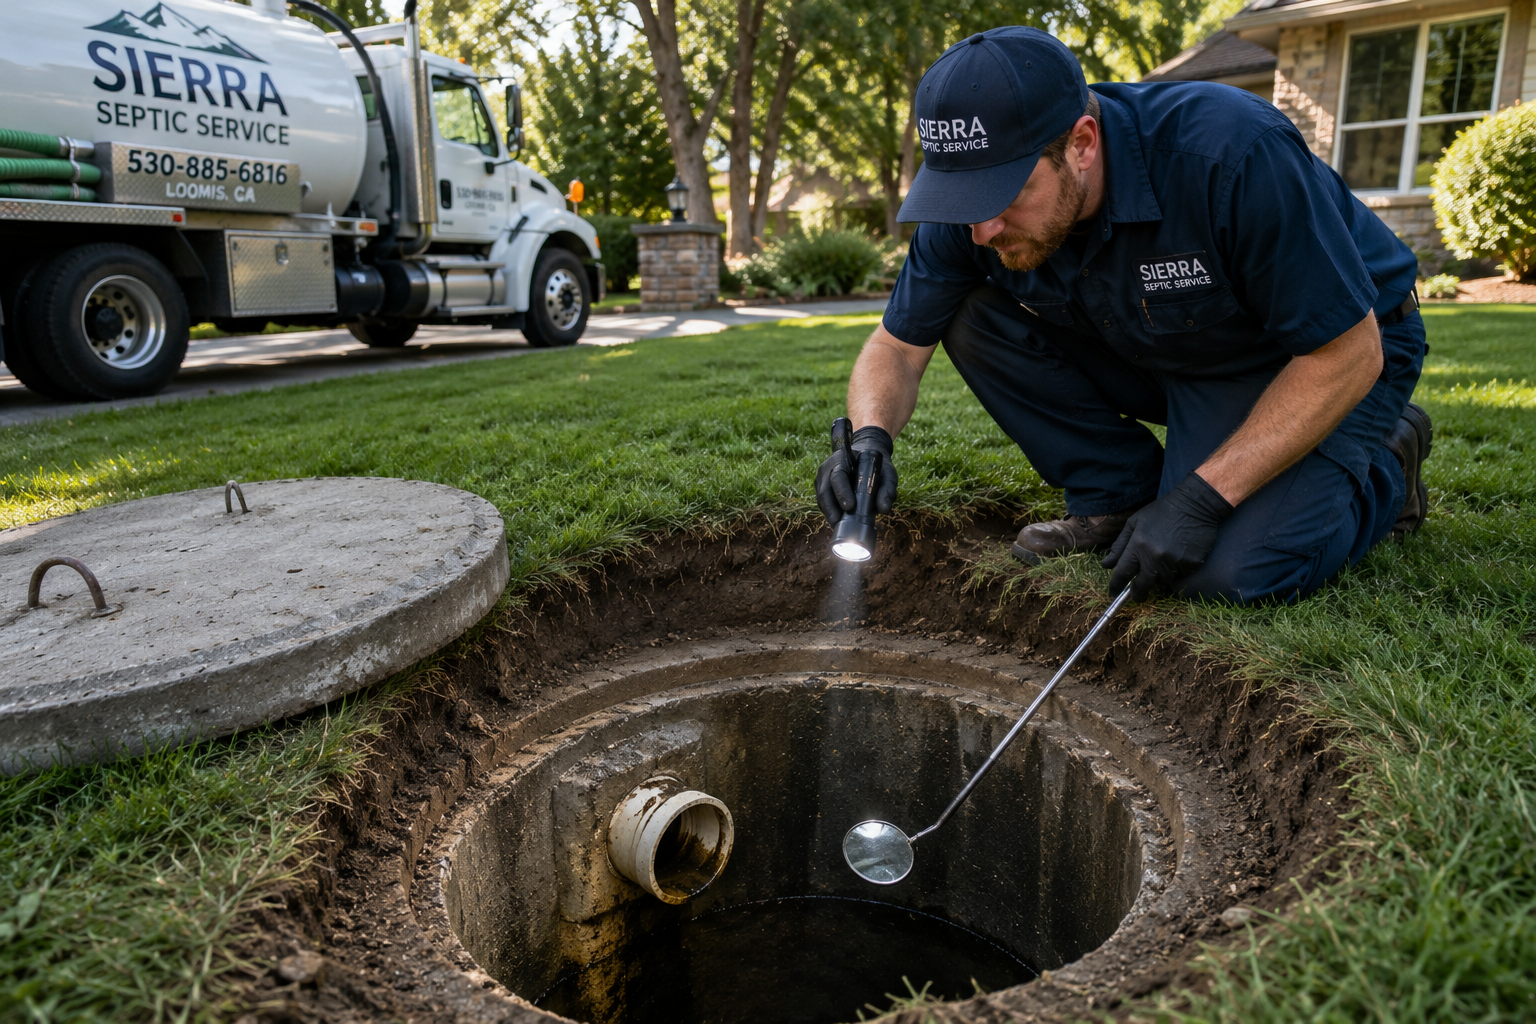
Septic emergencies rarely happen at a convenient time. If your drains start backing up on a rainy Saturday night, the last thing you want is a service crew struggling to find and unearth a buried lid in the mud. A visible septic tank riser cover ensures that our team can get straight to work, potentially saving your home from interior water damage. When time is of the essence, emergency pumping or troubleshooting is significantly more effective when the system is ready for immediate entry.
3. Enhancing Safety with Modern Locking Lids
Old concrete lids can become heavy, brittle, and dangerous over time. They can crack under the weight of a lawnmower or shift, creating a fall hazard. A modern septic tank riser kit utilizes high-density polyethylene (HDPE) materials that are incredibly strong and corrosion-resistant. These kits come with secondary safety screens and locking mechanisms that prevent children or pets from accidentally opening or falling into the tank. Safety is a major reason why many homeowners in Citrus Heights and Auburn choose to upgrade their older systems.
4. Simplifying Professional Inspections
If you are preparing to sell your home, a septic riser is a major selling point. During real estate septic inspections, having easy access allows inspectors to provide a more thorough and accurate report without the need for heavy equipment. Prospective buyers appreciate seeing a well-maintained system that won't require them to go on a "treasure hunt" for the tank lids every few years.
Common Misconceptions About Septic Risers
Some homeowners worry that a septic riser will be an eyesore. However, modern designs are built to be low-profile. You can find covers in green or black that blend into your turf, or you can even place light decorative items (like a hollow "fake rock") over them.
Another mistake is thinking that a DIY septic riser kit is a simple weekend project. While the concept is straightforward, ensuring a watertight seal between the riser and the tank is critical. If surface water leaks into the tank through a poorly installed riser, it can overload your leach field and lead to premature system failure. Professional installation ensures the riser is bolted and sealed correctly, protecting your system from the elements.
Ultimately, choosing to install septic system risers means you are choosing transparency and safety. You gain the ability to monitor your system’s levels easily, ensure your technicians can work efficiently, and provide a safer environment for your family.
Real-World Benefits: Seeing a Septic Tank Riser in Action
Moving from the technical details to everyday life makes the value of this upgrade even clearer. Here is how a septic tank riser solves common headaches for property owners in our community.
- The Seasonal Maintenance Scenario: A homeowner in Cool wanted to stay on top of their three-year pumping schedule without ruining their prize-winning flower beds. By installing a septic tank riser kit, they moved the access point to a manageable spot just outside the garden's edge. Now, when the service truck arrives, the technician simply opens the septic riser cover, pumps the tank, and leaves the landscaping perfectly undisturbed.
- The Emergency at Night: During a heavy rainstorm, a family noticed their toilets were gurgling—a classic sign of a pending backup. Because they had already installed a septic tank riser, our team was able to locate the tank instantly in the dark and rain. We pulled the septic tank lid riser, diagnosed a clogged outlet baffle, and cleared the line before any sewage could back up into the home.
- The Savvy Home Seller: A property owner in Colfax installed septic risers before listing their home to ensure a smooth inspection process. The buyer’s inspector noted the easy access as a sign of a well-maintained home, which helped the sale close without a single "contingency" related to the septic system.
These examples show that a septic riser isn't just a part; it's a long-term strategy for stress-free property management. Whatever your situation, this upgrade provides the same reliable results.
Pro Tips for Choosing and Maintaining Your Septic Tank Riser
Understanding the benefits is the first step, but applying that knowledge correctly ensures your upgrade lasts for decades. These professional insights bridge the gap between a basic installation and a truly high-performing system.
- Prioritize a Watertight Seal: When installing a septic tank riser, the connection point between the tank and the riser must be 100% watertight. If groundwater leaks into the system, it can hydraulically overload your leach field, leading to a total system failure. Always use high-quality butyl rubber sealant or specialized masonry fasteners to ensure environmental protection.
- Select High-Visibility, Low-Profile Covers: While you want your septic tank riser cover to be easy for a technician to find, you don't want it to be a tripping hazard. Look for heavy-duty plastic covers with textured surfaces to prevent slipping. Many homeowners in Loomis choose green covers that blend seamlessly with the lawn while remaining accessible.
- Install Secondary Safety Screens: Safety is paramount. A high-quality septic tank riser kit should include a secondary safety shield or "heavy-duty screen" beneath the main lid. This acts as a fallback protector, ensuring that if the primary septic tank lid riser is ever left loose or damaged, there is still a physical barrier preventing accidental entry into the tank.
- Regularly Inspect the Hardware: Every time your tank is pumped, take a moment to inspect the riser’s stainless steel screws and gaskets. Over time, soil shifts can put pressure on the assembly. Ensuring the hardware remains tight prevents odors from escaping and keeps debris out of your system.
By following these best practices, you ensure that your septic riser remains a safe, efficient, and cost-saving asset for your property's long-term health.
Take Control of Your System with a Septic Tank Riser
Upgrading to a septic tank riser is one of the most practical decisions a property owner can make. You now understand how this simple addition eliminates the need for messy excavation, reduces long-term maintenance costs, and provides a safer, more accessible access point for every service visit. By choosing a high-quality septic tank riser kit, you are moving away from the "out of sight, out of mind" risks of a buried system and toward a proactive, manageable approach to wastewater health.
Investing in a septic riser today means preventing the stress of a hidden emergency tomorrow. Whether you are tired of digging up your lawn or simply want the peace of mind that comes with modern safety features like a locking septic tank lid riser, the benefits to your property value and your wallet are immediate.
Don’t wait for your next backup to realize the value of easy access. Contact our expert team today for professional septic riser and lid installation and simplify your system maintenance for good.
Common Questions About Septic Tank Riser Installation
How much does a septic tank riser cost to install?
The cost of a septic tank riser depends on the depth of your tank and the material used, such as heavy-duty plastic or concrete. While there is an upfront investment, it typically pays for itself within a few service cycles by eliminating excavation fees. Professional installation ensures a watertight seal, preventing costly system overloads. Most homeowners find the convenience and long-term savings well worth the initial price.
Will a septic riser kit make my yard look unattractive?
Not at all. Modern septic tank riser kits are designed with a low profile to sit flush with your lawn. Most covers come in grass-green or black to blend in naturally. If you prefer total concealment, you can easily place a lightweight decorative rock or a potted plant over the septic riser cover. This keeps your system accessible for technicians while maintaining your home's curb appeal.
Can I install a septic riser cover myself?
While DIY kits exist, professional installation is highly recommended to ensure the system remains airtight. A loose or improperly sealed septic riser can allow surface water and debris to enter the tank, which often leads to outlet baffle issues or a flooded leach field. Experts have the tools to bolt and seal the riser correctly, ensuring it stays secure and odor-free for years.
Are septic system risers safe for children and pets?
Yes, safety is one of the primary reasons to install septic system risers. High-quality risers feature heavy-duty, reinforced lids that are much harder to displace than old, crumbling concrete covers. Most modern kits include secondary safety screens and locking bolts that require specific tools to open. This multi-layered approach provides a secure barrier that prevents accidental falls and keeps your family safe while playing in the yard.