Considering a DIY septic system to save money or expedite a build? Here is the truth. Septic rules are strict for good reasons: your health, your neighbor’s well, and your home value. Most “do it yourself septic system” plans skip required tests, use the wrong materials, and end up costing more than a permitted job.
Blue Ribbon Septic designs, installs, and maintains systems for local soil and code so you avoid delays, fines, and surprise repairs. We’ll show you exactly where DIY fits and where it becomes a bad bet.
This guide provides all the information you need for a complete DIY septic system project, including step-by-step instructions and illustrations to help you succeed.
What Is a DIY Septic System and Should You Build One?
A DIY septic system is a diy system created by the homeowner, using self-sourced tanks, pipes, and drainfield materials for onsite wastewater management. Because permits, soils, setbacks, and treatment standards are strict, most “do it yourself” builds are risky, often illegal, and costly to repair.
The owner is responsible for ensuring the diy system complies with all local codes and standards.
Safer options: soil testing, permitted design, and licensed installation from a local pro.
Read This Before You Start
A septic system is not one product. It is a working pair: a watertight tank that settles solids and a drainfield that returns treated water to the soil. The soil is the final filter. If your soil cannot absorb and treat wastewater, no plan, video, or shortcut will fix that.
Why do many DIY projects fail
- No soil evaluation or percolation test.
- Wrong system size for bedrooms and water use.
- Missing setbacks from wells, property lines, or streams.
- Unrated tanks or unsealed pipe joints that leak.
- No permits, which risks fines and stop-work orders. Not obtaining permits is breaking the law in most areas.
- A common mistake is not following proper installation procedures, which can lead to costly repairs.
Local rules expect: Local codes require soil testing, stamped designs when needed, setbacks, licensed installers, and inspections. Blue Ribbon Sceptic's guide to septic system decision-making factors explains how property size, soil, water table, and budget drive the right choice.
How Septic Systems Work In Plain Language
Tank, drainfield, soil: the trio
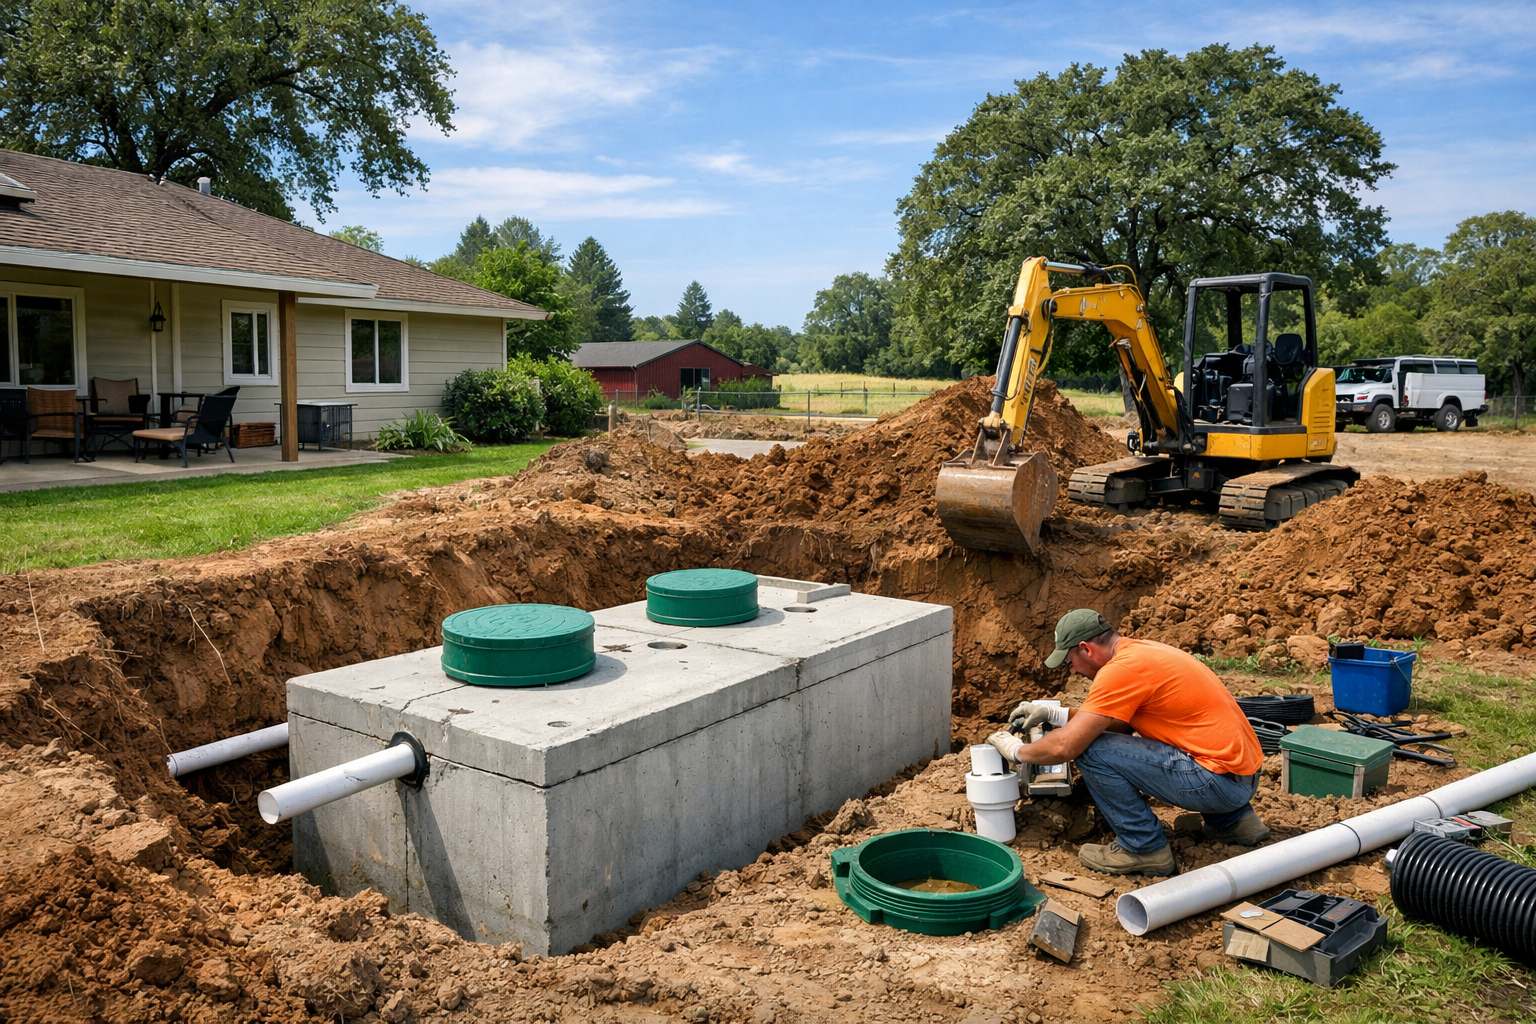
Wastewater enters one of the septic tanks commonly used in DIY and professional installations. The process begins as heavy solids sink, light grease floats, and the middle layer called effluent flows to the drainfield. In this process, solids and liquids are separated and treated through a series of steps involving pipes and tanks, ensuring efficient waste breakdown and disposal. There, a perforated pipe spreads water into gravel and soil. Good soil finishes the treatment with natural microbes. A baffle stops scum from escaping the tank. A filter adds extra protection.
Jargon decoder
- Effluent: the clarified liquid leaving the tank.
- Baffle: a barrier that keeps scum from clogging the outlet.
- Leach/drainfield: shallow trenches that spread effluent into soil.
Useful context: About 16% of new single-family homes started in 2021 used private septic, which shows how common properly permitted systems are even today.
Should You Attempt It? A 10-Minute Triage
Red flags that mean “do not DIY”
- Small lot, steep slope, or high water table.
- Shoreline or well nearby.
- Clay soil that drains slowly.
- Local rules require licensed installers.
- You plan a homemade septic tank or non-rated containers.
Attempting a DIY septic system in these situations can lead to unnecessary worry and long-term problems.
When limited DIY makes sense
- Gathering records and drawing a site plan.
- Clearing brush, marking utilities, and uncovering existing lids.
- Installing septic risers & lids after inspection to improve access.
- Routine checks and filter cleaning after a pro install.
Choosing the Right Equipment for Your DIY Septic System
Plan & size first
- Size the tank to household needs (bedrooms + daily water use).
- Undersized = backups/overload; oversized = wasted money/space.
Tank selection
- Choose durable materials: concrete or fiberglass (resist underground pressure/corrosion).
- Ensure internal baffles (separate solids/liquids) and a secure, watertight lid (prevent leaks/debris).
Drain (leach) field essentials
- Use high-quality pipes: PVC or ABS for waste and grey water lines.
- Design to soil absorption rate and household wastewater volume.
- Install with proper location, gravel bedding, and correct trench depth for safe soil filtration.
Indoor plumbing choices
- Install low-flow toilets, sinks, showers to reduce system strain.
- Composting toilet can reduce tank load and ease installation (check local regulations first).
Permits & oversight
- Review local laws and secure required permits before buying materials or digging.
- Many areas require a professional plumber/licensed installer to oversee or sign off even for DIY.
Build smart
- Select the right tank, pipes, and drain field materials and follow local guidelines for long-term, safe waste and grey water management.
- When in doubt, consult a professional to review plans and avoid common pitfalls.
Step-By-Step: The Smarter Homeowner Path
Before starting, gather essential tools such as a shovel, measuring tape, level, saw for cutting holes, pipe wrenches,; and sealant for joints.
1) Site & soil testingBook a soil evaluation first. It decides if a standard drainfield works or if you need alternatives like a mound or ATU. Poor soils and karst areas move contaminants quickly to groundwater, so testing is non-negotiable.Be sure to measure soil absorption rates and system dimensions to ensure proper setup.
2) Sizing & design decisions: System size depends on bedrooms and peak daily flow. Over- or undersizing leads to failures or wasted money. Use a licensed designer who knows local rules and setbacks.
3) Permits & inspections: Pull the permit, schedule inspections, and keep the plan on site. Skipping this can void home insurance, delay closings, and trigger fines.
4) Installation & quality control: Let a licensed installer place the tank, lay level laterals, and bed pipe correctly. When putting the system components in place according to the design, measure pipe slopes and tank placement. Cut the correct size hole in the tank or barrel for pipe connections, ensuring precise placement. Seal all pipe joints and tank seams with appropriate materials to prevent leaks and odors. Document depth, materials, and photos.
5) Start-up, testing, and documentation: Before final checks, fill the tank to the specified level to ensure proper functioning and sealing. Confirm flows, check for leaks, clean the filter, and file the “as-built” with your records.
Pro tip: Want the confidence of a pro install with some sweat equity? Choose pro installation, then take on non-technical tasks like trench backfill, seed, or installing septic risers & lids for future access using Blue Ribbon Septic’s upgrade service.
Costs: DIY vs Pro vs Hybrid
Line-item reality check: “cheap” diy septic system cost often hides these add-ons: engineering, permits, gravel, bedding sand, watertight tanks, risers, inspection repeats, and re-work if slopes or elevations are wrong. One failed drainfield can cost far more than hiring a pro from day one. For cabins, tiny homes, or other small-scale applications, a small system may be more affordable and easier to install.
Building your own system can be cost-effective if done correctly, as a well-designed own system can be tailored to your site and needs, saving money on unnecessary features.
Where homeowners waste money
- Buying unlisted tanks that do not meet code.
- Trench depths that cause standing effluent.
- No risers, which makes every pumping visit a dig.
- Skipping inspections, leading to tear-out and rebuild.
Watch-out: Many soils remove bacteria well but do not remove nitrogen effectively, which can harm wells and lakes. Pick a design that manages nitrogen where required.
Safer Alternatives To DIY
Pro installation with homeowner support: The best “diy septic” move is a hybrid: you gather records, clear access, and handle landscaping, while a licensed team installs to code. Professional support can help rid you of worries about system failures and costly repairs. Blue Ribbon Septic’s septic tank cleaning & pumping page and service area hub show how we support homeowners from design through maintenance.
Upgrades that save money later
- Septic risers & lids for fast future service.
- Effluent filters to protect the drainfield.
- A documented septic tank cleaning schedule to preserve warranties and resale value.
Household wells and shallow aquifers can be vulnerable when systems are poorly sited or maintained. Good sitting and maintenance protect groundwater.
Common Myths And Costly Mistakes
- “Additives replace pumping.” They do not. Schedule septic tank pumping on a real timeline.
- “Bigger pipe solves slow drains.” Soil and slope decide this, not pipe size alone.
- “Any plastic tank works.” Use locally approved tanks only.
- “All soils are fine.” Many clays percolate too slowly.
- “I can place the drainfield anywhere.” Setbacks from wells and water apply.
- “No one checks.” Inspectors do, and buyers will during escrow.
- “DIY always works.” Improper installation can result in a broken system that fails prematurely and requires costly repairs.
Never dump chemicals or non-biodegradable waste into your septic system, as this can cause environmental hazards and system failure. Only toilet paper and human waste should be flushed; flushing other materials can clog pipes and damage the system. Practicing proper flush habits is essential for septic system longevity.
In one USGS study of private wells, human fecal microbes were detected in 46% of sampled wells, with rainfall increasing risk proof that siting and maintenance matter.
Maintenance That Protects Your Warranty
Simple monthly checks
- Walk the field for wet spots or odors
- Clean the outlet filter as advised.
- Record water-use spikes.
Pumping & inspection schedule
Pump on a schedule that matches your household, then log every visit. Start with Blue Ribbon Sceptic's guide on how often to pump your tank and our inspection checklist for homeowners. Regular service prevents backups and protects your drainfield for decades.
Quick, Scannable Checklist
- Soil test and design by a licensed pro.
- Permits and inspections scheduled.
- Rated tank, correct elevations, level laterals.
- Effluent filter + septic risers & lids installed.
- Start-up test, photos, and as-built files.
- Pumping and inspection plan set for year one.
Conclusion: Build Smart, Stay Legal, Protect Your Property
A diy septic system installation can look tempting on paper. The catch is what the paper does not show: soil limits, code requirements, and long-term groundwater risk. If you want the budget wins of DIY without the downside, choose the hybrid path. Let Blue Ribbon Septic handle testing, permits, design, and installation, while you tackle safe tasks and long-term care.


